Discover the best methods to remove plastisol ink using specialized removers and solvents. Learn Plastisol Remover step-by-step techniques .
1. Plastisol Remover: What Removes Plastisol? Understanding the Basics
Plastisol ink is a versatile and durable choice for screen printing. However, its longevity also means it can be challenging to remove. The key to successfully removing plastisol lies in using the right tools and techniques.
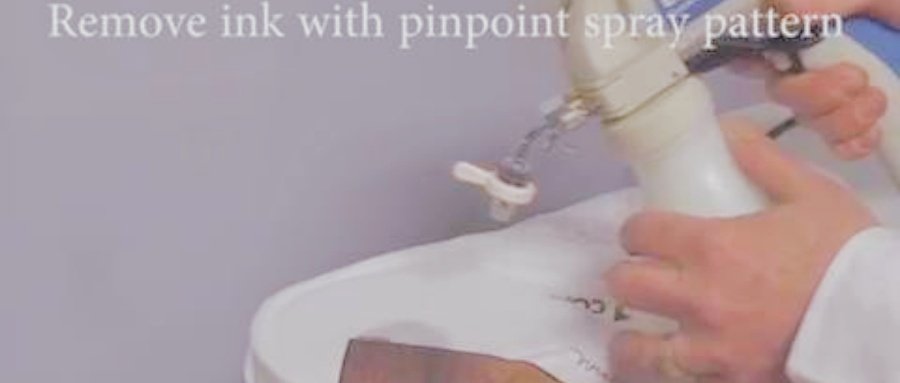
Plastisol remover is the most effective solution for breaking down plastisol ink without damaging the fabric or screen. While some may attempt to use household items like rubbing alcohol or acetone, these alternatives are often less effective and can cause damage.
Understanding what removes plastisol is crucial for anyone involved in screen printing or dealing with plastisol transfers. Using the right remover ensures that you can clean screens and fabrics efficiently and safely.
2. Plastisol Remover: The Solvent for Plastisol Ink
When it comes to dissolving plastisol ink, the choice of solvent is critical. Plastisol removers are specifically formulated to break down the ink’s chemical structure. This makes it easier to remove from screens and fabrics.
Other solvents like mineral spirits and acetone can also be used, but they may not be as effective as commercial plastisol removers. The key is to select a solvent that is both powerful and safe for the materials you are working with.
Always follow the plastisol ink manufacturer’s instructions to ensure the best results and avoid any potential damage. Using the right solvent will save you time and effort in the long run.
3. Plastisol Remover: How to Remove Plastisol Transfers
Removing plastisol transfers can seem daunting, but with the right approach, it can be done efficiently. Here’s a step-by-step guide to help you remove plastisol transfers:
Step 1: Heat the Transfer
Use a heat press or an iron to heat the transfer. This will soften the plastisol ink, making it easier to remove.
Step 2: Apply Plastisol Remover
Once the transfer is heated, apply a plastisol remover to the area. Allow it to sit for a few minutes to break down the ink.
Step 3: Scrape Off the Ink
Use a plastic scraper or an old credit card to gently scrape off the softened ink.
Step 4: Wash the Fabric
After removing the ink, wash the fabric thoroughly to remove any residue from the plastisol remover.
By following these steps, you can effectively remove plastisol transfers without damaging the underlying fabric. This method ensures that your materials are restored to their original condition.
4. Plastisol Remover: Removing Screen Plastic
Screen plastic, or emulsion, is a common component in screen printing. Removing it requires a different approach than removing plastisol ink. Here’s how to clean screen printing frames effectively:
Step 1: Apply Emulsion Remover
Use a commercial emulsion remover and apply it to both sides of the screen.
Step 2: Scrub the Screen
Use a scrub brush or sponge to scrub the screen, ensuring the remover penetrates the emulsion.
Step 3: Rinse with Water
Rinse the screen thoroughly with water to remove the emulsion and remover.
Step 4: Repeat if Necessary
If traces of emulsion remain, repeat the process until the screen is clean.
This method ensures that your screen printing frames are ready for reuse without any residue. Proper cleaning will extend the life of your screens and improve the quality of your prints.
5. Plastisol Remover: What Dissolves Screen Printing Ink?
Screen printing ink, including plastisol, can be dissolved using various solvents. Here are some of the most effective options:
- Plastisol Remover: Specifically designed to dissolve plastisol ink.
- Mineral Spirits: A common choice in the printing industry for cleaning screens and tools.
- Acetone: A powerful solvent that can dissolve many types of ink, including plastisol.
- Rubbing Alcohol: Useful for small areas but may not be as effective as other solvents.
Choosing the right solvent depends on the type of ink and the material you are working with. Always test a small area first to ensure compatibility. Using the right solvent will make the removal process much easier and more efficient.
6. Plastisol Remover: How to Strip Plastisol
Stripping plastisol ink from screens or fabrics involves a few essential steps:
Step 1: Apply Plastisol Remover
Apply a generous amount of plastisol remover to the inked area.
Step 2: Let it Sit
Allow the remover to sit for a few minutes to break down the ink.
Step 3: Scrub the Area
Use a scrub brush or sponge to scrub the area, loosening the ink.
Step 4: Rinse with Water
Rinse the area thoroughly with water to remove the ink and remover.
Step 5: Repeat if Necessary
If any ink remains, repeat the process until the area is clean.
This method ensures that plastisol ink is removed effectively and safely. Proper stripping techniques will help you avoid damage to your screens and fabrics while ensuring a thorough cleanup.
Conclusion: Mastering Plastisol Removal
Removing plastisol ink and transfers can be challenging, but with the right tools and techniques, it can be done efficiently. Using a specialized plastisol remover is the most effective way to break down and remove plastisol ink without damaging the fabric or screen.
Whether you’re dealing with plastisol transfers, screen plastic, or screen printing ink, following the steps outlined in this guide will help you achieve the best results. With the right approach, you can save time, reduce waste, and improve the quality of your screen printing projects.


