
Uncover the top screen print squeegee choices, techniques, and expert advice to achieve impeccable screen printing results.
How to Use a Screen Print Squeegee Like a Pro
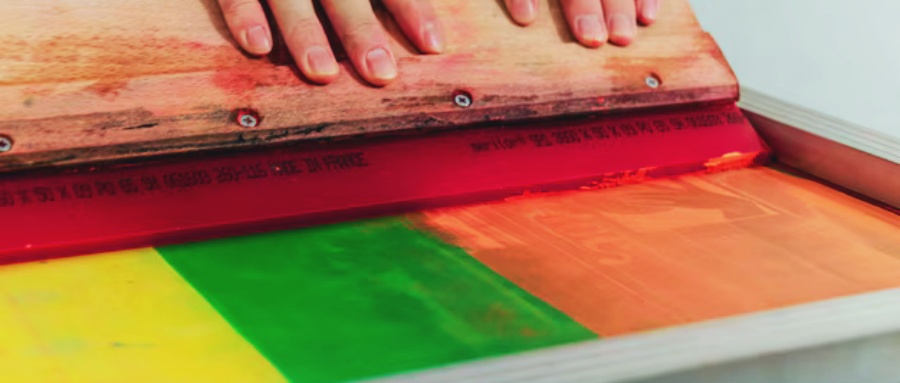
Screen printing is a versatile technique for transferring designs onto fabrics, posters, and other surfaces. Central to this process is the screen print squeegee, a tool designed to push ink through a mesh screen onto the material below. To achieve professional-quality prints, mastering the art of squeegeeing is essential. Here’s a step-by-step guide:
- Prepare the Screen: Secure your screen on a stable surface or printing press. Ensure it’s coated with emulsion and the design is properly exposed.
- Apply Ink: Place your screen print squeegee at the top of the screen and add a generous line of ink along the edge. This ensures even coverage during printing.
- Angle and Pressure: Hold the squeegee at a 45-degree angle to the screen. Apply steady, even pressure as you pull it downward, allowing the ink to pass through the mesh.
- Pull the Squeegee: Use a smooth, controlled motion to drag the squeegee across the screen. The ink should transfer only in the design areas, leaving the rest of the screen untouched.
- Second Pass: For thicker or more vibrant prints, make a second pass to ensure full ink saturation.
- Lift the Screen: Carefully lift the screen to reveal your print. Repeat the process for additional prints or colors.
With practice, you’ll refine your squeegeeing technique, producing sharp, durable prints every time.
What Can Replace a Screen Print Squeegee?
While a screen print squeegee is the ideal tool, there are alternatives for small-scale or DIY projects:
- Plastic Cards: An old credit card or similar flat plastic object can work for basic prints. Use it at a slight angle to push ink through the screen.
- Wooden or Metal Tools: Homemade squeegees made from wood or metal can serve as substitutes in non-traditional setups.
- Rollers: A roller can distribute ink evenly but often lacks the precision needed for intricate designs.
While these alternatives can suffice for simple tasks, they can’t match the consistency and control of a dedicated screen print squeegee.
How to Choose the Best Screen Print Squeegee

Selecting the right screen print squeegee is critical for achieving high-quality prints. Here’s what to consider:
- Blade Material:
- Rubber: Affordable and versatile, rubber squeegees work well with both plastisol and water-based inks.
- Silicone: Durable and resistant to wear, silicone is ideal for high-volume printing and specialty inks.
- Handle Type:
- Wooden: Comfortable and cost-effective.
- Metal: Durable and stable for heavy-duty use.
- Plastic: Lightweight and easy to handle.
- Blade Hardness (Durometer):
- Soft Blades: Best for delicate fabrics.
- Hard Blades: Ideal for thick materials or detailed designs.
- Blade Size:
- Small Blades (6-8 inches): Perfect for intricate designs or small prints.
- Large Blades (12+ inches): Suitable for large-scale prints and even ink distribution.
By considering these factors, you can choose a squeegee that delivers crisp, vibrant prints tailored to your project.
Rubber vs. Silicone: Which Squeegee Material is Better?
The choice between rubber and silicone depends on your printing needs:
- Rubber Squeegees: Affordable and versatile, rubber is great for beginners or small-scale projects. It works well with most inks and provides excellent control.
- Silicone Squeegees: More durable and resistant to wear, silicone is ideal for high-volume or commercial printing. It’s also better suited for high-viscosity inks and specialty applications.
If you’re looking for a budget-friendly option, rubber is a solid choice. For heavy-duty use and precision, silicone is the way to go.
What’s the Ideal Squeegee Angle for Screen Printing?
Holding your screen print squeegee at the correct angle is crucial for optimal results. A 45-degree angle is widely recommended because:
- It ensures consistent pressure for even ink distribution.
- It prevents excess ink from pooling, reducing smudging.
- It’s comfortable for extended printing sessions.
By maintaining this angle, you’ll achieve sharper lines and cleaner prints.
What Size Squeegee Should You Use?
The size of your screen print squeegee should match your design and material:
- Small Designs: Use a 6-8 inch squeegee for precision and control.
- Large Designs: Opt for a 12+ inch squeegee to cover the screen in one pass.
- Fabric Type: Smaller squeegees work well on thin fabrics, while larger ones are better for thick materials.
Choosing the right size ensures efficient ink application and consistent results.
Final Thoughts
The screen print squeegee is a cornerstone of successful screen printing. By mastering its use, selecting the right material and size, and applying the correct angle and pressure, you can elevate your printing projects to a professional level. Whether you choose rubber or silicone, understanding these key factors will help you produce vibrant, long-lasting prints.
With these tips, you’re well-equipped to tackle any screen printing project with confidence and precision.
