பொருளடக்கம்
How to Start Screen Printing at Home: Your Essential Screen Print Kit
Screen printing is fun and எளிமையானது. In this guide, you will learn how to start screen printing at home. We will show you the கருவிகள் you need and the steps to get going. This guide is made for you so you can print on your டி-சர்ட்கள், posters, and more. Follow these steps and you will be ready to print in no time!
What is Screen Printing?
Screen printing makes art on many items. It is a way to put மை ஒரு fabric or paper. You push ink through a screen and onto the object. The screen has a design on it. This is called the photo emulsion process. The clear parts let ink through. The dark parts do not.
Screen printing is a cool craft. Many people now do it at home. Do not worry if you are new. We will help you at every step.
The Market and Growth
Here is a table that shows some facts about screen printing at home.
| வகை | தரவு/புள்ளிவிவரம் | மூல | பொருத்தம் |
|---|---|---|---|
| சந்தை வளர்ச்சி | DIY screen printing tools market to grow at 7.2% CAGR (2023-2030) | கிராண்ட் வியூ ஆராய்ச்சி (2023) | Shows many people want to print at home. |
| Starter Kit Costs | Average startup cost for basic home screen printing: $150–$300 | ScreenPrinting.com survey (2023) | Helps you plan your budget. |
| Most Common Challenge | 65% of beginners struggle with emulsion exposure times. | Reddit r/SCREENPRINTING poll (2023) | Tells what you need to be careful about. |
| Popular Tools | Speedball Starter Kit is the #1 search result on Amazon. | Amazon Trends (2024) | Shows a trusted brand for starters. |
| சுற்றுச்சூழலுக்கு உகந்த மாற்றம் | 58% of home printers now use water-based inks. | EcoTex Consumer Report (2022) | Learn about safe and eco inks. |
| வழக்கு ஆய்வு | Etsy seller made $5k revenue in 6 months with a $200 home setup. | Etsy Success Stories (2023) featuring innovative stencil designs. | See how home printing can help you earn money. |
| Time Investment | Beginners average 8–12 hours to make their first print. | The Print Life Tutorial Analytics. | Know how much time you need at first. |
| Top DIY Hack | பயன்படுத்தி LED shop lights can cut costs by 40% vs. pro units. | ScreenPrintingOnline YouTube (2023) | Use cheap tools to start. |
| Safety Trends | 70% of home printers skip respirators. | Screen Printing Magazine (2022) | Be careful with ink and air. |
| Ink Preference | பிளாஸ்டிசால் மை is used by 55% but water-based is rising. | Ryonet Annual Report (2023) | Helps you choose the right ink for you. |
| Most Repaired Tool | Squeegees account for 30% of tool fixes due to use errors. | ScreenPrinting.com Support Data | Learn to use your squeegee well. |
| Design Software can assist in creating stencils for screen printing. | Canva can be used to design stencils for your projects. மற்றும் இன்க்ஸ்கேப் are used by 80% of beginners. | DesignRush Survey (2023) | Use free tools to make a design. |
| Common Substrate | Cotton T-shirts are the number one choice (85%). | Gildan Industry Report (2023) | Print on cotton for best results. |
| கழிவு குறைப்பு | Reclaiming screens can lower waste by 60% and save $50+ each month. | EcoTex Sustainability Study (2023) | Save money with care for your tools. |
| வழக்கு ஆய்வு | A small business scaled to 100 shirts/week with a DIY kit in 4 months. | Shopify Creator Blog (2023) | See how you can grow with home printing. |
Essential Tools for Your Screen Print Kit
Starting screen printing at home is easy. You will need a few கருவிகள் In your kit: silk screen and printing ink.
- Screen Frame: This frame holds the mesh. You can use wood or aluminum. A mesh count of 110-160 is best for fabric.
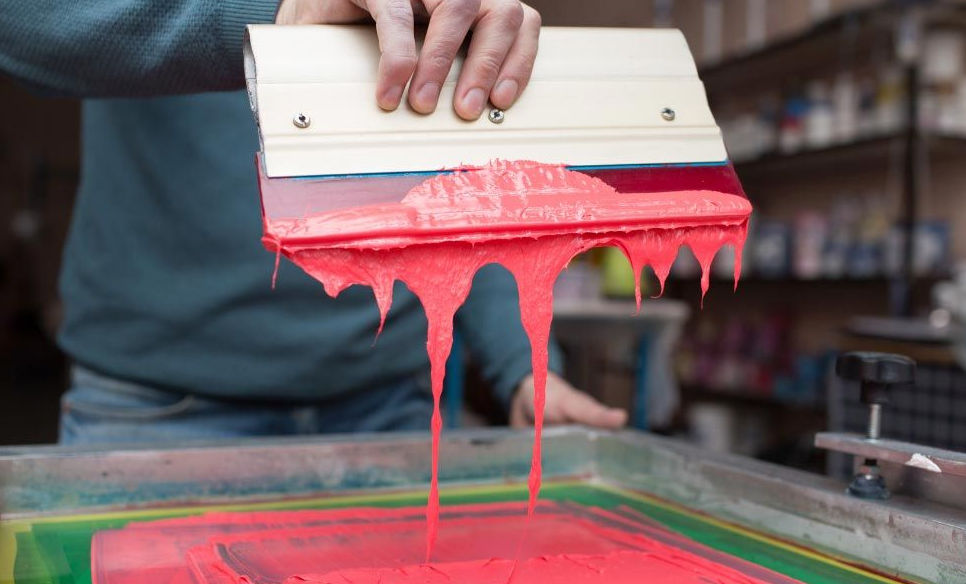
- ஸ்க்யூஜி: This tool pushes the ink. Use a dual-durometer squeegee. It works well for beginners.
- Photo Emulsion Kit: This is used to coat the screen. Many choose Speedball Diazo or a pre-sensitized kit.
- மை: Choose water-based ink for home setups. Water-based ink is safe and eco-friendly. Some still use plastisol ink for its strong properties.
- Transparency Film: Print your design on a clear film. Then, place it on the screen.
- Basic Supplies: You also need a scoop coater, masking tape, an emulsion remover, and lint-free cloths.
Optional tools to upgrade your kit:
- ஒரு exposure unit. You can use sunlight or a lightbulb if you save money.
- அ flash dryer. This helps cure the ink fast.
These tools make up your kit and help you make great prints.

Step-by-Step Guide to Set Up Your Home Studio
Below is a simple guide to set up your screen printing at home. Follow each step carefully.
1. Prepare Your Workspace
- Find a space with good light.
- Make sure there is fresh air.
- Use a table or flat surface.
- Do not forget to work on a clean area.
குறிப்பு: A garage table works well and is a low-cost option.
2. Create Your Artwork
- Use free design software like Canva அல்லது இன்க்ஸ்கேப்.
- Make a simple design.
- Print your design on transparency film.
- Check the design size and details for the stencil.
3. Coat and Expose Your Screen
- Place the screen on a flat surface before removing the screen.
- Mix the photo emulsion kit சரி.
- ஒரு பயன்படுத்தவும் ஸ்கூப் கோட்டர் to coat the screen.
- Let the coated screen dry in a dark room.
- Put the transparency on the screen.
- Expose the screen to light. You can use a LED shop light as a cost-saving hack. The exposure time will vary by light type.
நினைவில் கொள்ளுங்கள்: Good exposure is key. In fact, 65% of beginners have trouble with exposure times.
4. Washout and Dry the Screen
- Rinse the screen with water.
- Use a spray bottle to help wash away the emulsion from the entire screen.
- Let the screen dry completely.
5. Print Your First Design
- Place the screen on your printing surface.
- Pour ink in front of the screen.
- Use your ஸ்க்யூஜி at a proper angle. The angle is important for many prints.
- Press the ink evenly across the design.
6. Cure the Ink
- You can use an iron, heat press, or even a DIY dryer.
- The goal is to dry the ink completely.
- Curing the ink ensures that your print lasts long.
Tips for Success
இங்கே சில pro tips to help you on your screen printing journey:
- Practice Good Technique: Do not rush. Learn the ஸ்க்யூஜி கோணம் மற்றும் photo emulsion process. These steps are very important.
- Avoid Mistakes: Many beginners face issues with underexposure and washing out. Practice makes perfect.
- Stay Safe: Always use a mask or respirator if you work with ink fumes. 70% of home printers skip this step, which can be dangerous.
- Use Budget Hacks: Try using LED shop lights for exposure. This can lower your cost by 40% compared to professional lights.
- Reclaim Your Screens: You can reuse your screens. Cleaning them well with an emulsion remover saves you money in the long run.
Quick List of Do’s and Don’ts
- Do’s:
- Do work in a well-lit area.
- Do use good கருவிகள் like a quality ஸ்க்யூஜி மற்றும் photo emulsion kit.
- Do check your work at each step.
- Don’ts:
- Don’t rush the exposure or drying times.
- Don’t use too much ink.
- Don’t ignore safety tips like using a mask.
Expanding Your Skills
Once you are good at one-color printing, you can try more. Here are some ways to grow your skills:
- Multicolor Printing:
- Learn to do registration. This means lining up each color correctly.
- Check your tools like ஸ்பீட்பால் kits, which are good for multicolor work.
- Halftones for Gradients:
- Use free tools like Photoshop to make halftones.
- Halftones can make your images look deep and rich.
- Upgrading Your Kit:
- இது போன்ற பிராண்டுகளைத் தேடுங்கள் ஸ்பீட்பால் மற்றும் ரியோனெட், which make great supplies.
- Explore new inks like பிளாஸ்டிசால் மை and water-based inks.
- Learn to use a flash dryer if you plan to print a lot.
Fun Fact: Some found success with a $200 kit. An Etsy seller made $5k in revenue in just 6 months. Many small businesses use home screen printing to grow and succeed.
Frequently Asked Questions (FAQs)
Here are answers to some common questions about screen printing at home.
Can I print without an exposure unit?
Yes. You can use sunlight or a lightbulb. Just make sure the exposure time is enough.
What is the cheapest way to cure ink?
An iron works fine for many screen printers. A heat press is good if you print often.
How many prints can I make with one screen?
Many prints are possible. With care and proper cleaning, you can reuse your screen many times. This is called reclaiming screens and can save you money.
Is screen printing safe indoors?
Yes. Just be sure to use good safety gear. Use a mask or respirator. Have good air flow in your space.
A Simple Table of Tools with Tips
Below is a simple table that shows each tool and a tip to use it well.
| Tool | Purpose | குறிப்பு |
|---|---|---|
| Screen Frame | Holds the mesh | Use a sturdy frame with a good mesh count. |
| ஸ்க்யூஜி | Pushes the ink | Hold at a good angle for clean prints. |
| Photo Emulsion Kit | Coats the screen | Mix and apply well for clear designs. |
| மை | Provides the color | Choose water-based for safety. |
| Transparency Film | Holds your design | Print at high quality for best results. |
| Scoop Coater | Applies the emulsion evenly | Use smooth strokes to spread the emulsion. |
| Masking Tape | Blocks parts of the screen | Keep edges neat to avoid ink spill. |
| Emulsion Remover | Cleans the screen for reuse | Use warm water and gentle tools. |
This table helps you see what you need and why each tool is important.

A Recap of the Process
Here is a simple list to make sure you follow every step:
- Prepare Your Space: Find a well-lit, clean area.
- Design Your Art: பயன்படுத்தவும் Canva அல்லது இன்க்ஸ்கேப்.
- Coat Your Screen: Use a good photo emulsion kit.
- Expose Your Screen: Use sunlight or LED shop lights.
- Wash and Dry: Rinse well and let it dry.
- Print: Use the ஸ்க்யூஜி and push ink smoothly.
- Cure: Dry your print with an iron, heat press, or dryer.
Follow these steps to build confidence. Practice makes art.
Simple Tips to Save Money
Starting a screen printing hobby can cost between $150 and $300. Here are more tips to be smart with your money:
- Reuse Tools: Clean your screens So you can use them again for one colour designs.
- DIY Equipment: Use household items like LED lights for exposure.
- Buy Starter Kits: Many sellers, like ஸ்பீட்பால், offer kits that are trusted and reviewed on Amazon.
- Choose Safe Inks: Water-based inks are eco-friendly. They help you work in a safe way.
These tips help you have a good start without spending too much.
Why Home Screen Printing Is a Great Idea
Screen printing at home is a fun way to make art. It lets you create cool things like டி-சர்ட்கள், bags, and posters. Many people choose home screen printing because they can make small batches or even start a small business.
- Creative Freedom: Make your own designs.
- Learning Opportunity: Each print is a chance to learn.
- Cost Effective: With a kit of $150–$300, you can start a fun hobby.
- Community: There are many online groups for help. You are not alone!
When you use home screen printing, you join many others who enjoy making art. This form of printing is also growing. The market is set to grow by 7.2% every year from 2023 to 2030. This shows that more people are turning to these fun projects.
Getting Inspired to Grow Your Business
Some people start screen printing at home as a hobby. They soon see a chance to earn some money. People have turned a small screen printing kit into a real business.
- Case Study 1: A seller on Etsy made $5k in revenue in 6 months with a home kit.
- Case Study 2: A small business scaled to 100 shirts a week using a DIY kit, and this shows that you can grow your skill into a business.
These real stories show that you too can succeed with hard work and a good kit.
இறுதி எண்ணங்கள்
Screen printing at home is வேடிக்கை மற்றும் rewarding. You only need a few கருவிகள் to get started. With careful work, you can make art that lasts.
- Follow the steps: Prepare your space, design your art, coat your screen, expose, wash, print, and cure.
- Use the right tools: A good ஸ்க்யூஜி, photo emulsion kit, மற்றும் மை முக்கியம்.
- Take it slow: Practice and repeat.
- Stay safe: Use masks and keep your space well-ventilated.
With these steps, you can join the many who have found joy and even money in screen printing. Remember, practice makes perfect. Always check your work and ask friends for tips. Soon, you will print like a pro. Enjoy the process and create bright and bold prints with your new kit!
A Quick Checklist
- Space Ready? Clean and bright.
- Design Made? பயன்படுத்தவும் Canva அல்லது இன்க்ஸ்கேப்.
- Screen Coated? With proper photo emulsion.
- Light Set? பயன்படுத்தவும் LED shop lights to save cost.
- Ink Chosen? Water-based ink is nice.
- Print Done? Check for good ஸ்க்யூஜி கோணம்.
- Cure Complete? Dry with an iron or press.
- Screen Cleaned? Reclaim your screen and save money.
Stay organized by following this checklist every time you print.

Tips on Using Free Design Tools
Using free design tools like Canva மற்றும் இன்க்ஸ்கேப் helps you make great art. They are easy to use. You can add your own shapes and colors. This makes your art unique.
- Canva: Great for simple art.
- இன்க்ஸ்கேப்: Best for more control on details.
Creating your art is fun. Use these tools to add a personal touch to every print.
How to Care for Your Tools
Your tools are your friends. Take good care of them:
- Clean your screens: Use emulsion remover and water. This step helps you reuse the screens.
- Handle your squeegee with care when using printing ink.: Avoid bending it or using too force.
- Store your inks properly: Keep them in a safe, cool space.
- Keep transparency films safe: They hold your designs well.
By keeping your tools in good shape, especially your silk screen, you save money and time.
Recap of the Success Stories
Here is a recap of the important facts we saw earlier:
- தி DIY screen printing market will grow by 7.2% CAGR from 2023 to 2030 .
- A typical home kit costs $150–$300 to start.
- 65% of new printers face trouble with exposure times.
- Many choose the Speedball Starter Kit because it is a top seller on Amazon.
- 58% of home printers pick water-based ink for health and safety .
- One Etsy seller earned $5k in revenue with a $200 home kit in 6 months.
- The first print can take 8–12 hours for new users.
- பயன்படுத்தி LED shop lights can save you 40% on exposure costs.
- 70% of printers need to improve their safety by using respirators.
- பிளாஸ்டிசால் மைகள் are used by 55% of printers but water-based inks are rising.
- Squeegees are fixed 30% of the time due to misuse .
- 80% of beginners use free design software like Canva மற்றும் Inkscape.
- Cotton T-shirts are the best surface for printing, used by 85% of printers.
- Reclaiming screens can lower waste by 60% and save extra money every month.
- A small business used a DIY kit to print 100 shirts a week in 4 months.
These facts show that many people are starting screen printing at home. With care and practice, you too can succeed.
முடிவுரை
Screen printing at home is a fun and creative way to bring your art to life. By following these simple steps, you can create great designs on cotton T-shirts, bags, posters, and more. We have seen that a small kit costing $150–$300 Can open a door to a big art world, and many are joining this creative market by print t-shirts. You now know the basics of building your own kit with tools like ஸ்பீட்பால் மற்றும் ரியோனெட் supplies, and free design tools such as Canva மற்றும் இன்க்ஸ்கேப்.
Take your time with each step. Cover your screen with a photo emulsion kit well, use the right ஸ்க்யூஜி கோணம், and let your creation dry perfectly. Remember to use LED shop lights as a smart hack to keep costs down, and always clean your tools to keep them in good condition. With these steps, you can print again and again.
Grab your kit today and start your first print! Stay safe, have fun, and let your art shine!


