
Table of Contents
Custom Silkscreen Stencils for Easy Screen Print Projects
Silk screen printing is a popular and versatile printing method used by artists, hobbyists, and professionals to create high-quality, long-lasting designs on various surfaces, including fabric, paper, and wood. One essential element of this process is the stencil, which determines the final printed image. Silk screen stencils offer a way to personalize and simplify the screen printing process, making it accessible to beginners while providing precision for experienced printers. In this article, we will explore the benefits, creation methods, and best practices for using reusable screen printing stencils. silk screen stencils Consider using a painting stencil to enhance your screen print projects.
What Are Silk Screen Stencils?
Silk screen stencils are the templates used to block certain areas of a screen, allowing ink to pass through only where the design has been cut out. These stencils enable consistent reproduction of images, logos, or text across multiple prints. Silk screen stencils offer a personalized approach, allowing users to create unique and intricate designs for various applications.

Benefits of Using Silk Screen Stencils
1. Precision and Detail
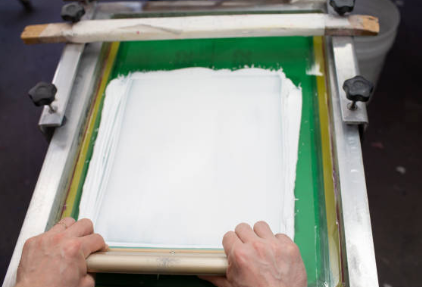
Silk screen stencils Silk screen stencils allow for highly detailed and intricate designs that may be difficult to achieve using traditional freehand painting or drawing techniques, especially when used with mylar. With digital design and cutting technology, you can achieve sharp edges and fine lines with ease in your silk screen for polymer clay projects.
2. Reusability and Durability
High-quality silk screen stencils, when properly maintained, can be reused multiple times. This makes them a cost-effective solution for businesses, artists, and DIY enthusiasts who want to create consistent prints over time using custom screen printing stencils.
3. Ease of Use
Silk screen stencils Simplify the printing process with custom stencils, making it easy for beginners to produce professional-looking prints. Once the custom screen stencil is prepared and attached to the screen, the printing process becomes straightforward, reducing the chance of errors.
4. Versatility Across Materials
Silk screen stencils can be used on a variety of materials, including fabric (T-shirts, tote bags), paper (posters, greeting cards), wood (signs, home decor), and even glass and ceramics. This versatility makes them a valuable tool for artists and businesses alike.

Methods for Creating Silk Screen Stencils
1. Hand-Cut Stencils
For those who prefer a hands-on approach, creating silk screen stencils DIY screen printing by hand is a simple and effective method.
Steps:
- Draw or print your design on a sheet of stencil paper or acetate.
- Use a sharp craft knife or stencil cutter to carefully cut out the design for your custom silk screen.
- Attach the stencil to the silk screen mesh using tape or stencil adhesive.
2. Vinyl Cutter Stencils
Vinyl cutters like Cricut or Silhouette machines allow for precise stencil creation using adhesive-backed vinyl or stencil film.
Steps:
- Design your stencil using vector-based software like Adobe Illustrator or CorelDRAW to create a custom screen.
- Load the vinyl or stencil film into the cutter and let it cut the design.
- Remove the excess material and apply the stencil to the screen.
3. Photo Emulsion Stencils
This professional method involves coating the screen with a light-sensitive emulsion, exposing it to a design, and then washing out the unexposed areas to create a stencil.
Steps:
- Coat the screen with photo emulsion and let it dry in a dark room.
- Print the design onto a transparent film and place it onto the screen.
- Expose the screen to UV light, then rinse it to reveal the silk screen stencil for polymer clay.
Best Practices for Using Silk Screen Stencils
1. Choosing the Right Mesh Count
The mesh count of your screen determines how much ink passes through. Lower mesh counts (80-160) allow for thicker ink deposits, while higher mesh counts (200-305) are suitable for finer details in custom screen printing.
2. Securing the Stencil Properly
Ensure the stencil is securely attached to the screen to prevent shifting during printing, especially when using adhesive silk screen methods. Use screen adhesive, masking tape, or hinge clamps for stability.
3. Using the Right Ink
Different materials require different types of printing ink for optimal results.
- Plastisol ink: Ideal for fabric printing due to its durability and opacity.
- Water-based inkSuitable for paper and eco-friendly fabric prints, especially when using custom silk screen stencils.
- Acrylic or enamel inkBest for wood, glass, and other non-porous surfaces when using screen printing ink.
4. Proper Ink Application
- Use a high-quality squeegee at a 45-degree angle.
- Apply even pressure to push the ink through the stencil onto the substrate when printing on glass.
- Perform multiple passes if necessary to ensure full coverage.
5. Cleaning and Storage
- Clean the screen and silk screen stencils immediately after printing to prevent ink from drying and clogging the mesh.
- Store stencils flat or rolled up in a dry, cool area to extend their lifespan.

Applications of Silk Screen Stencils
1. T-Shirt and Apparel Printing
Silk screen stencils are widely used for printing logos, slogans, and artwork on T-shirts, hoodies, and tote bags.
2. Home Decor and Crafts
Silk screen stencils can be used to create unique patterns on pillows, furniture, and wall art.
3. Business Branding and Promotional Items
Businesses use adhesive silk screen techniques to enhance their printing processes. silk screen stencils to print their logos on promotional items like tote bags, posters, and packaging.
4. Event and Holiday Decorations
Silk screen stencils allow for the creation of personalized greeting cards, banners, and decorations for weddings, birthdays, and holidays.
Advanced Techniques for Silk Screen Stencils
1. Layering Stencils for Multi-Color Designs
Using multiple silk screen stencils allows you to create complex, multi-color prints. Each color is applied separately, with careful alignment.
2. Heat Setting Ink for Longevity
After printing, heat setting your design ensures that it remains vibrant and durable over time, especially for fabric applications.
3. Experimenting with Textures
Incorporate unique textures by varying ink thickness, using specialty inks, or combining screen printing ink techniques with silk screen stencils for polymer. silk screen stencils Experiment with screen stencils for polymer clay in combination with other printing techniques.
Conclusion
Silk screen stencils offer an efficient and precise way to enhance screen printing projects. Whether you’re a beginner looking for an easy way to get started or an experienced printer seeking better control over your designs, silk screen stencils Custom stencils provide the flexibility, durability, and quality needed for professional results. By choosing the right stencil creation method, following best practices, and experimenting with different inks and materials, you can unlock endless creative possibilities in screen printing.