
Tabla de contenido
Make Cool Stuff with Screen Prints: Custom Silkscreen Stencils for Unique Designs
Silkscreen printing, also known as screen printing, is a versatile and rewarding art form that allows creators to transfer intricate designs onto almost any surface—fabric, paper, wood, metal, and more. At the heart of this process lies the silk screen stencil, a critical tool that defines the precision and creativity of your final product.
Whether you’re a DIY enthusiast, an artist, or a small business owner, mastering the use of custom silk screen stencils opens up endless possibilities for crafting unique, professional-quality items. In this guide, we’ll explore how to design, prepare, and use silk screen stencils to turn your ideas into tangible works of art.
¿Qué son las plantillas de serigrafía?
Silk screen stencils are templates made from fine mesh screens (traditionally silk, now often polyester or nylon) that block ink from passing through certain areas, creating a design when ink is pressed through the open spaces. The stencil acts as a mask, ensuring only specific parts of the substrate receive color. While modern technology offers photochemical and digital methods for stencil creation, the core principle remains the same: a well-crafted silk screen stencil is the key to crisp, repeatable prints.
The beauty of silk screen stencils lies in their adaptability. They can be reused for multiple projects, modified for different colors, or scaled to fit various surfaces. With practice, even beginners can create stencils that rival commercial prints.

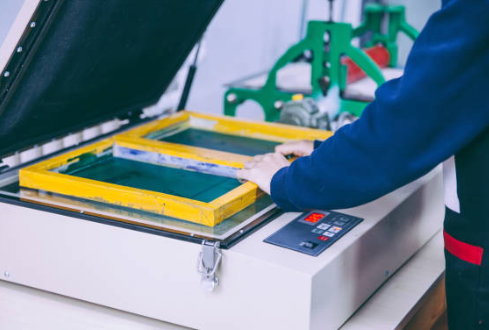
Materials You’ll Need
Before diving into the creative process, gather these essentials:
- Pantalla: A mesh screen stretched over a frame (wood or aluminum).
- Emulsión: Light-sensitive liquid used to coat the screen.
- Stencil Film or Paper: For hand-cut designs (a budget-friendly option).
- Escobilla de goma: To press ink through the screen.
- Tinta: Fabric, acrylic, or specialty inks depending on your project.
- Design Tools: Software (e.g., Adobe Illustrator) for digital designs, or markers and paper for hand-drawn stencils.
- Exposure Unit or UV Light: For hardening emulsion (if using photo-emulsion stencils).
Creating Custom Silk Screen Stencils: Step-by-Step
1. Diseña tu obra de arte
Start with a bold, high-contrast design. Simple shapes and thick lines work best for silk screen stencils, especially for beginners. Avoid overly intricate details unless you’re using advanced techniques.
- Hand-Drawn Stencils: Sketch your design on stencil paper or acetate film. Use an X-Acto knife to cut out the areas where ink should pass through.
- Digital Designs: Create vector artwork using software. Print your design onto transparency film using a laser printer or photocopier.
Pro Tip: If you’re layering colors, create separate silk screen stencils for each hue.
2. Prepare the Screen
Coat your screen with emulsion in a darkroom or dimly lit area. Use a scoop coater to spread a thin, even layer on both sides of the mesh. Let it dry completely.
3. Expose the Design
Place your stencil (transparency film or cut-out paper) onto the dried emulsion-coated screen. Expose it to UV light using an exposure unit or a bright lamp. The light hardens the emulsion except where your design blocks it.
4. Wash Out the Stencil
Rinse the screen with water. The unhardened emulsion (under your design) will wash away, leaving open mesh areas for ink to flow through. Let the screen dry.
5. Test and Adjust
Before committing to a final print, do a test run on scrap material. Check for gaps or imperfections in the silk screen stencil. Use screen filler or tape to block accidental holes.

Design Tips for Stunning Silk Screen Stencils
- Layer Bold and Subtle Elements: Combine thick outlines with delicate patterns for depth.
- Experiment with Textures: Use torn paper, lace, or leaves as masks for organic effects.
- Play with Color: Overlapping silk screen stencils can create gradient or mixed-color effects.
- Repurpose Old Screens: Strip used stencils with emulsion remover and start fresh.
Project Ideas Using Silk Screen Stencils
- Ropa personalizada: Print band logos, activist slogans, or abstract patterns on T-shirts, tote bags, or hoodies.
- Decoración del hogar: Design unique pillowcases, tablecloths, or wall art.
- Posters and Merchandise: Create limited-edition gig posters, stickers, or coffee mugs.
- Eco-Friendly Gifts: Print reusable cloth napkins, tea towels, or beeswax wraps.
Solución de problemas comunes
- Impresiones borrosas: Ensure the screen is tightly stretched and the squeegee pressure is even.
- Sangrado de tinta: Use thicker emulsion layers or lower-viscosity ink.
- Stencil Peeling: Re-expose the screen if emulsion wasn’t fully hardened.
Why Silk Screen Stencils Stand Out
Unlike digital printing, screen printing with custom stencils adds a tactile, handmade quality to your work. Each print carries slight variations, making every piece unique. Plus, silk screen stencils are cost-effective for bulk production—perfect for small businesses or event merchandise.
Conclusión
Silk screen stencils are the bridge between imagination and reality. By mastering this technique, you’ll unlock the ability to print vibrant, durable designs on nearly any surface. Whether you’re crafting personalized gifts or launching a clothing line, custom silk screen stencils empower you to make cool stuff that stands out. So grab your screen, mix some ink, and let your creativity flow—one stencil at a time!